Things You’ll Need:
Ingredients
1. Vanilla Cake (adapted from The Chocolate Cake Mix Doctor by Anne Byrn)
2. 1 package of white cake mix
3. 1 package of instant vanilla pudding
4. 1 cup sour cream
5. ½ cup vegetable oil
6. ½ cup water
7. 4 eggs

Icing
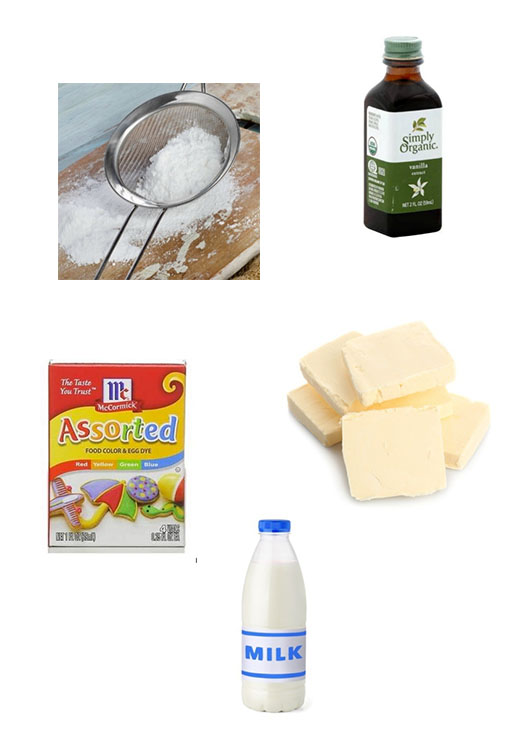
1. 3 cups sifted powdered sugar
2. 6 tablespoons butter, melted
3. 5 tablespoons of milk
4. 2 teaspoons vanilla extract
5. Food coloring
Decorations
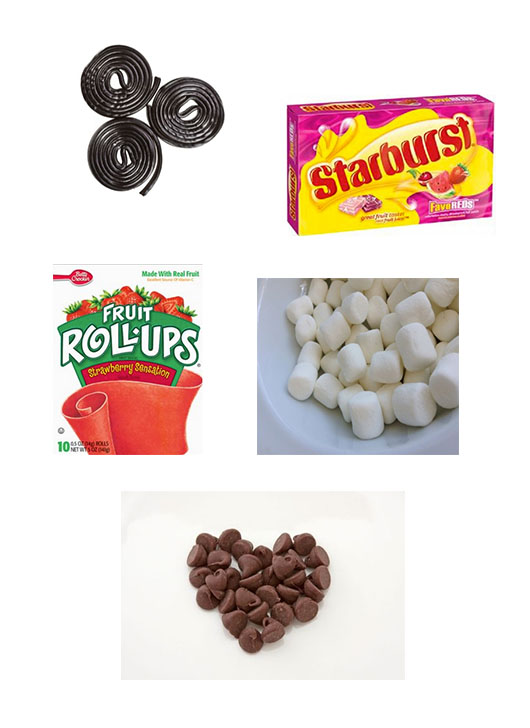
1. Licorice (for the eyebrows and whiskers)
2. Pink or red starburst (for the nose)
3. Red fruit roll up (for the tongue and the bow)
4. Marshmallows or extra white icing (for the eyes and the inside of the ears)
5. Chocolate chips (for the eyes)
Materials
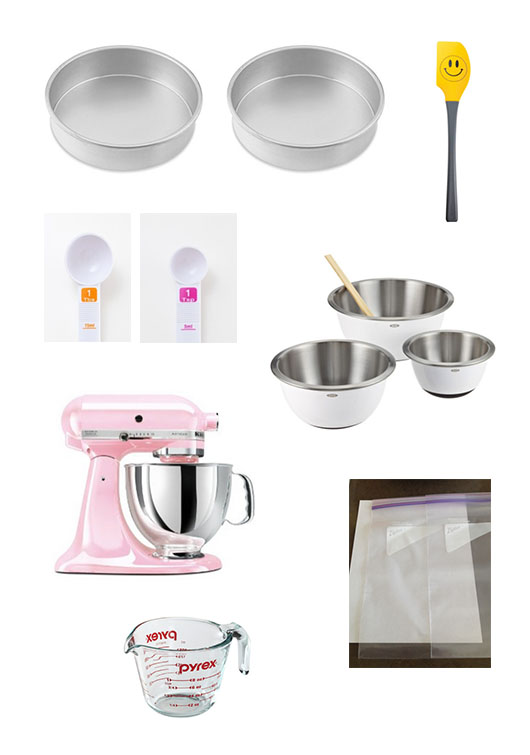
1. 2 round cake pans
2. 2 large zip lock bags
3. Spatula
4. Mixing bowls
5. Electric beater
6. Teaspoon
7. Tablespoon
How to make your very own wonderful cake:
1. Ask a grown up to join you in the kitchen! 2. Ask the grown up to preheat the oven to 350⁰ F. 3. Grease 2 9-inch round cake pans with baking spray. 4. In a large bowl mix together the cake mix, pudding, sour cream, vegetable oil, water and eggs. 5. With an electric mixer, beat the mixture for 2 minutes until it looks like this: 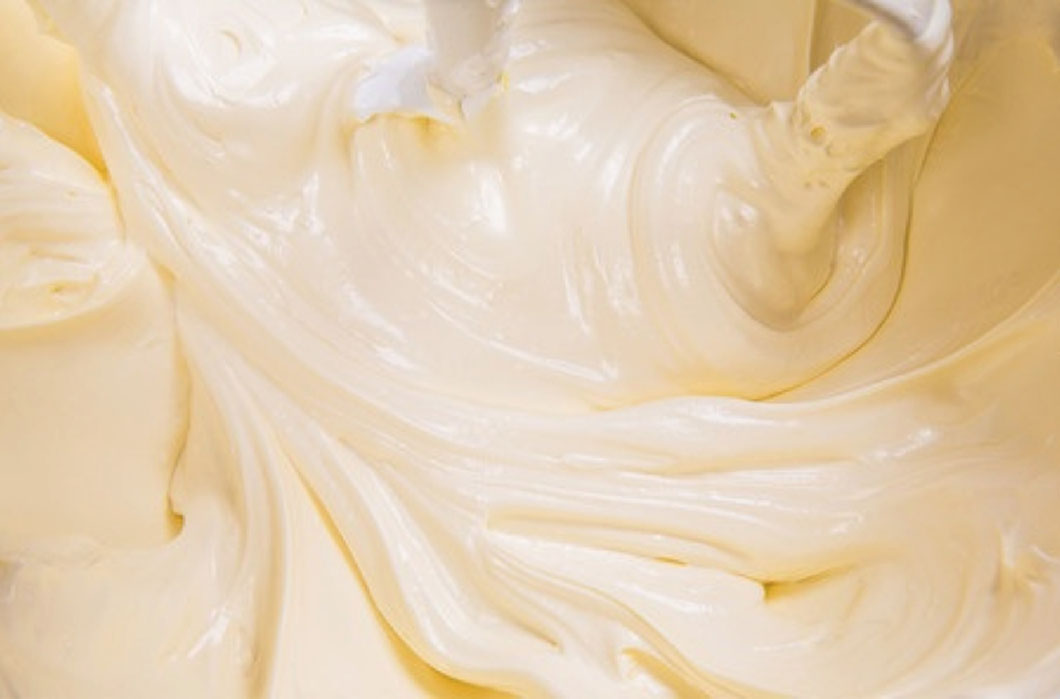
YUM!
6. Pour half of the batter into each cake pan. (If you want to, you can save a little of the cake mixture out and make some cupcakes too!) 7. With a grown up’s help open the oven door and put the cakes inside. 8. Bake the cakes for 25 to 30 minutes, or until a toothpick inserted in the middle of the cake comes out clean. (Ask the grown up to help you check on the cakes after 25 minutes, make sure you use oven mitts to take the cakes out, and be careful, they are hot!) 9. Allow to cool in the pans on a wire rack for 20 minutes. 
10. With help, carefully flip the cakes onto the wire racks to let them finish cooling.
How to make your very own wonderful icing:
1. Put the powdered sugar, butter, milk, and vanilla into a bowl and mix until it is creamy! 2. If the icing is too thick you can add more milk. 3. Put 1/3 of the icing into a smaller bowl, this icing remains white. 4. Color the leftover 2/3 icing any color that you like! We chose to make our cat a light orange, but you can choose any color that you like! 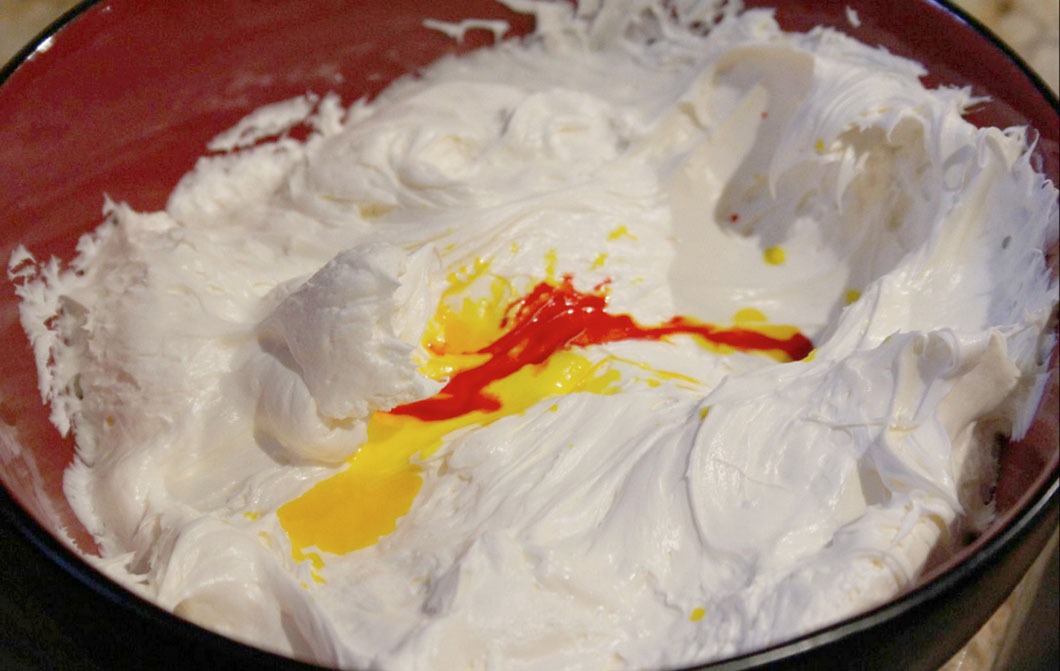 Once the cake is completely cool you are ready to start decorating, YAY! These directions and photos are here to help you, but feel free to be creative.
How to decorate your very own wonderful cake:
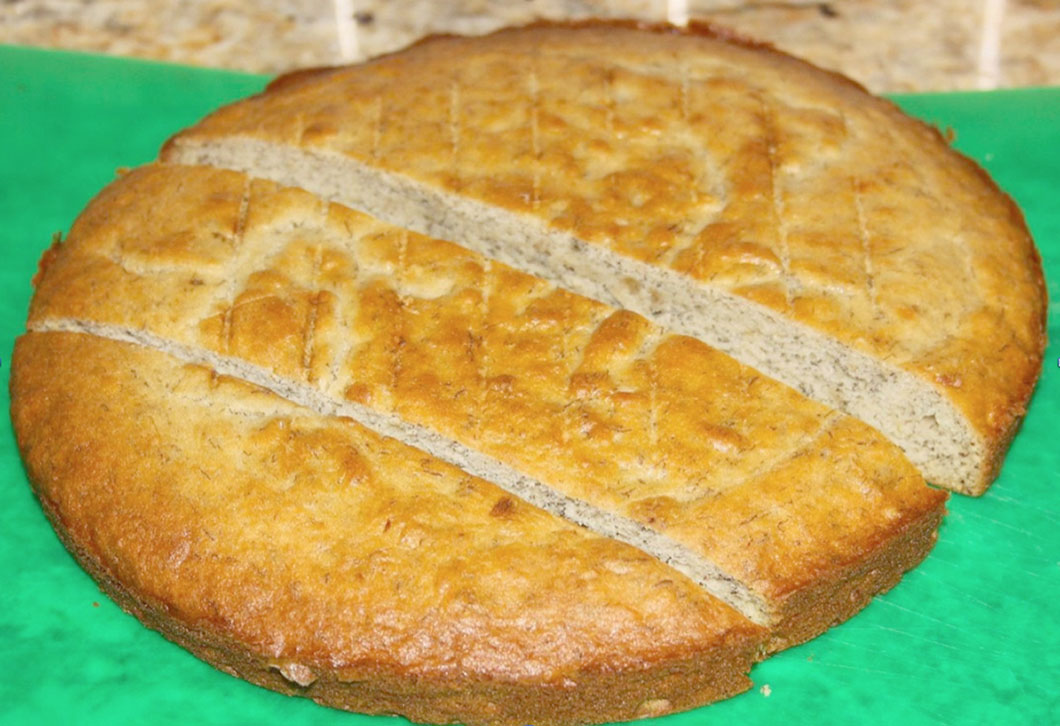
1. Place one of the cakes on a cake plate. 2. Ask a grown up to cut two triangles out of the other cake to make the ears. 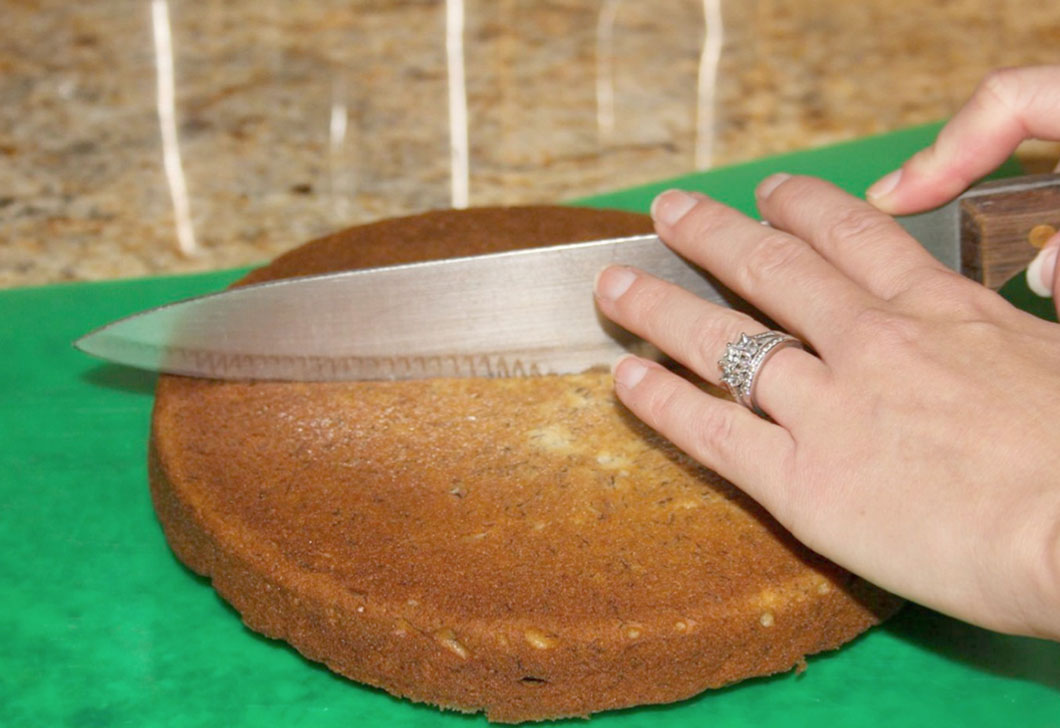
3. Place the ears on the cake board. 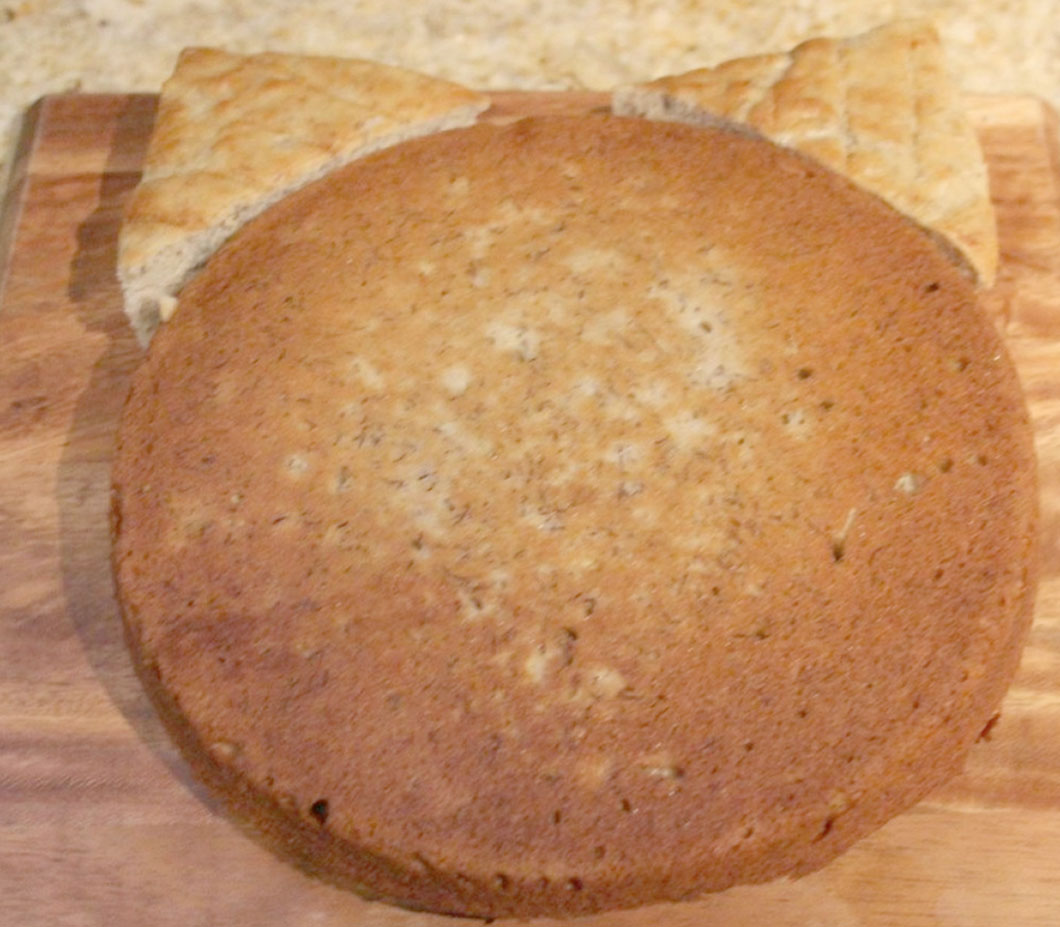
4. Put the orange and white icing into two separate zip lock bags. Cut out a small square from the corner of the bag. 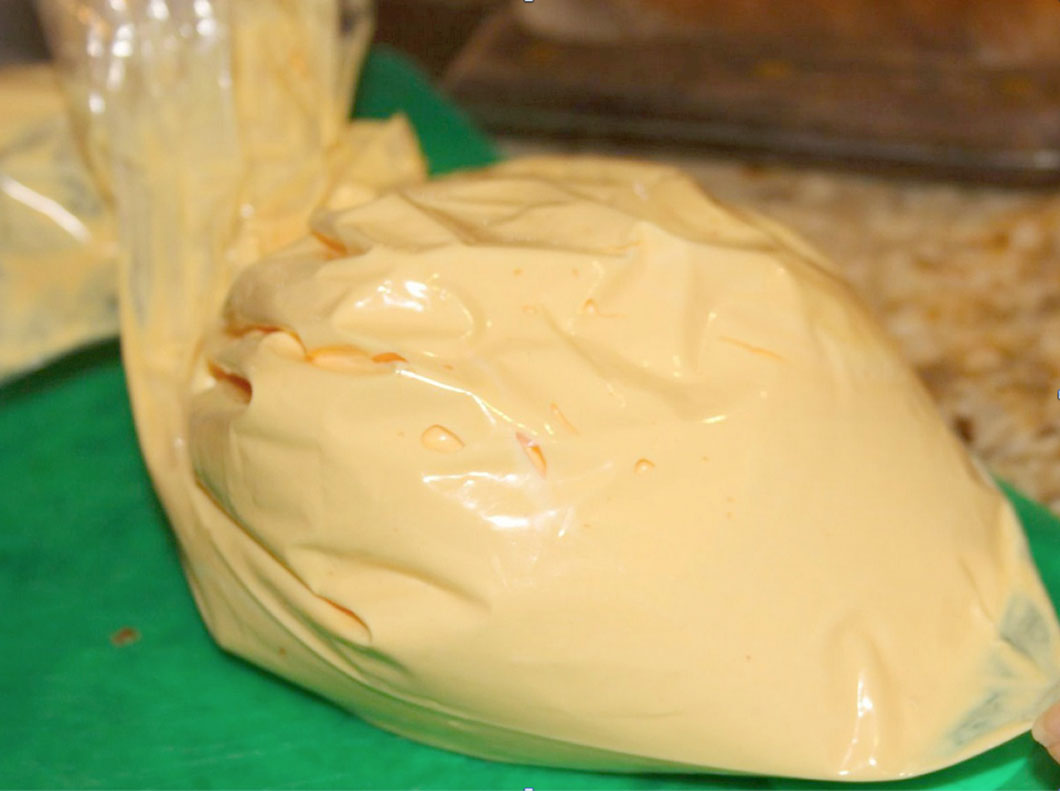
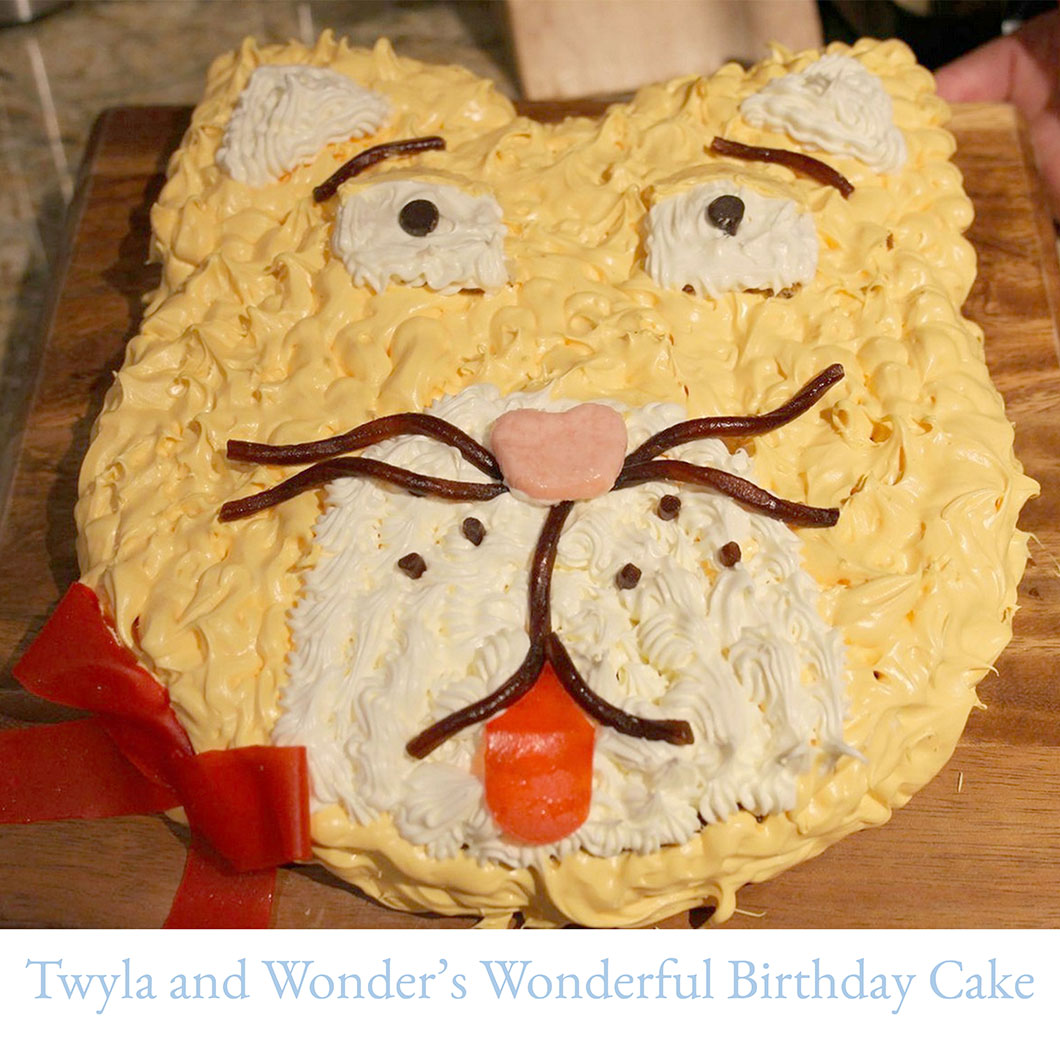
5. Put the icing on the cake in any design that you like. We put orange all over and then white at the mouth and the ears. 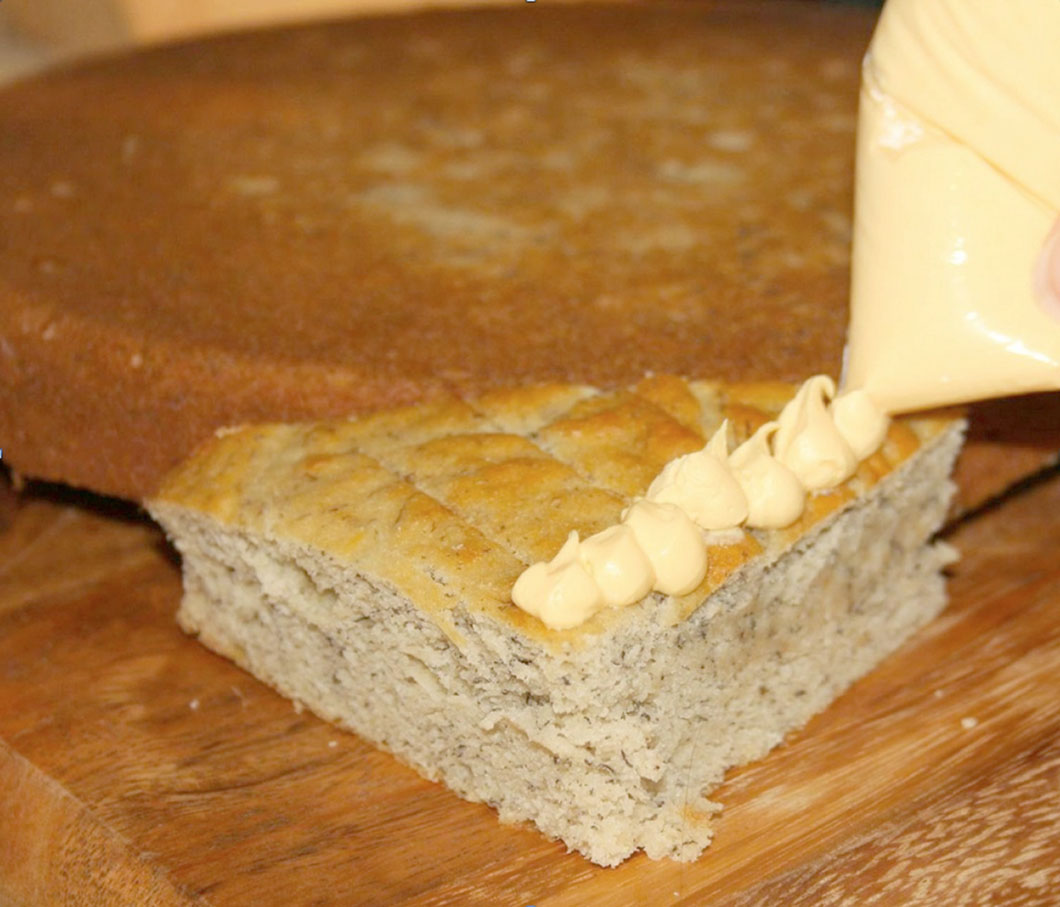
6. When all of the cake is covered with icing, it is time to decorate! 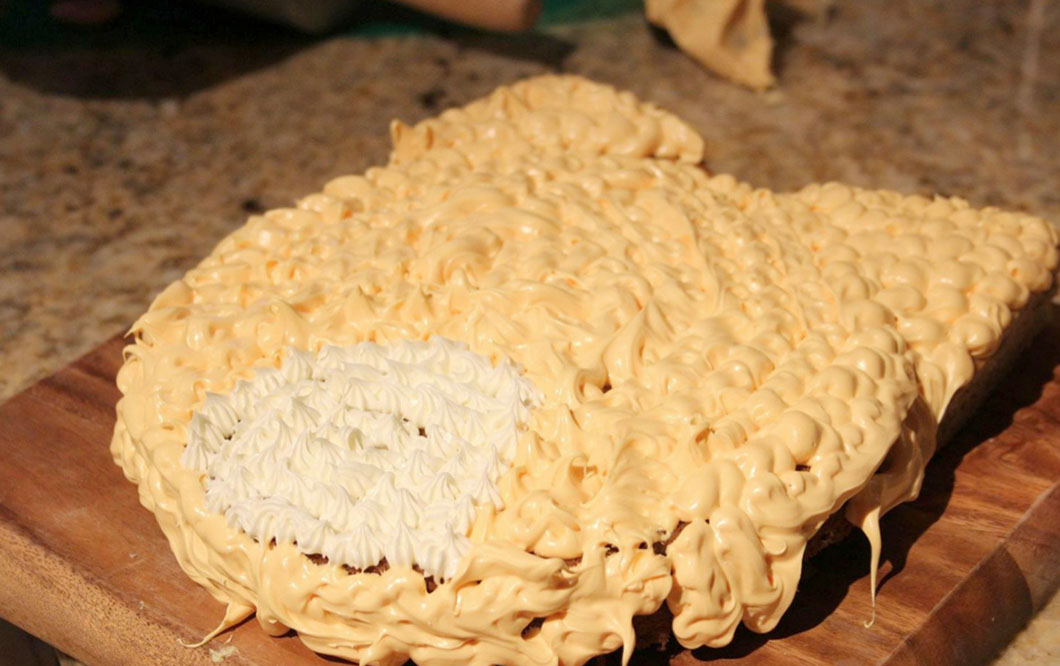
7. You can use any of the candy that you have to add on eyes, whiskers, a nose, and even a bow! Here we used the Twizzlers for the eyebrows… 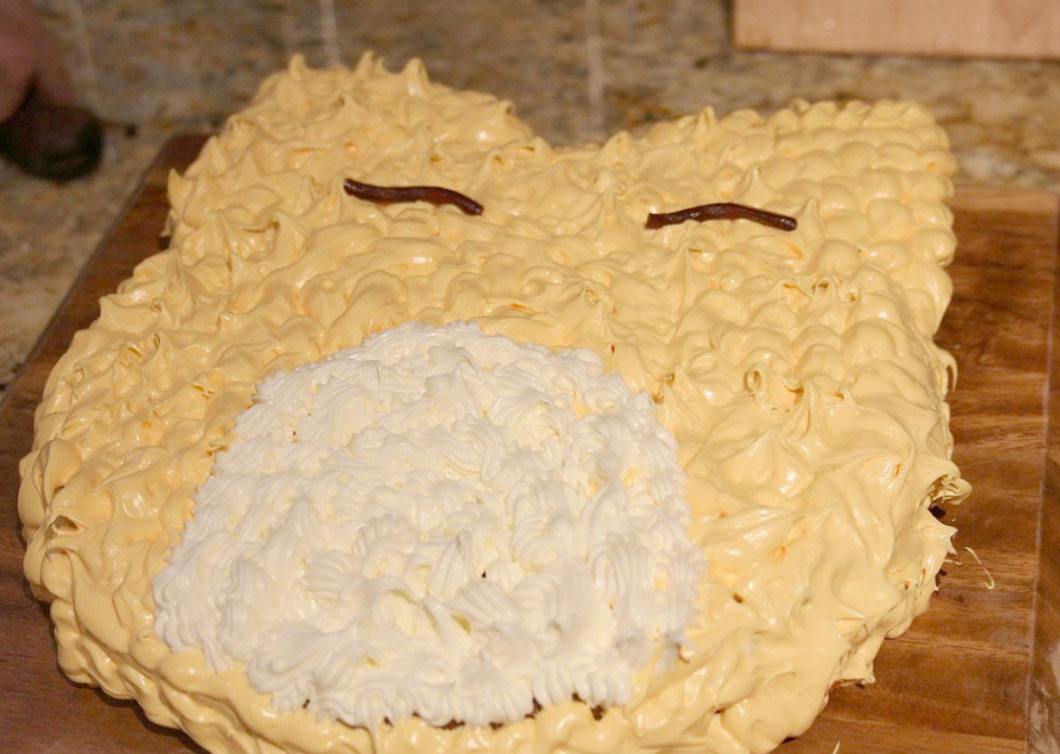
8. We used a fruit roll up for the tongue, chocolate chips for the eyes, and a strawberry starburst for the nose! We even added Twizzler whiskers and chocolate chip freckles! (We decided to add a bit more white frosting to the ears too. We ❤ icing 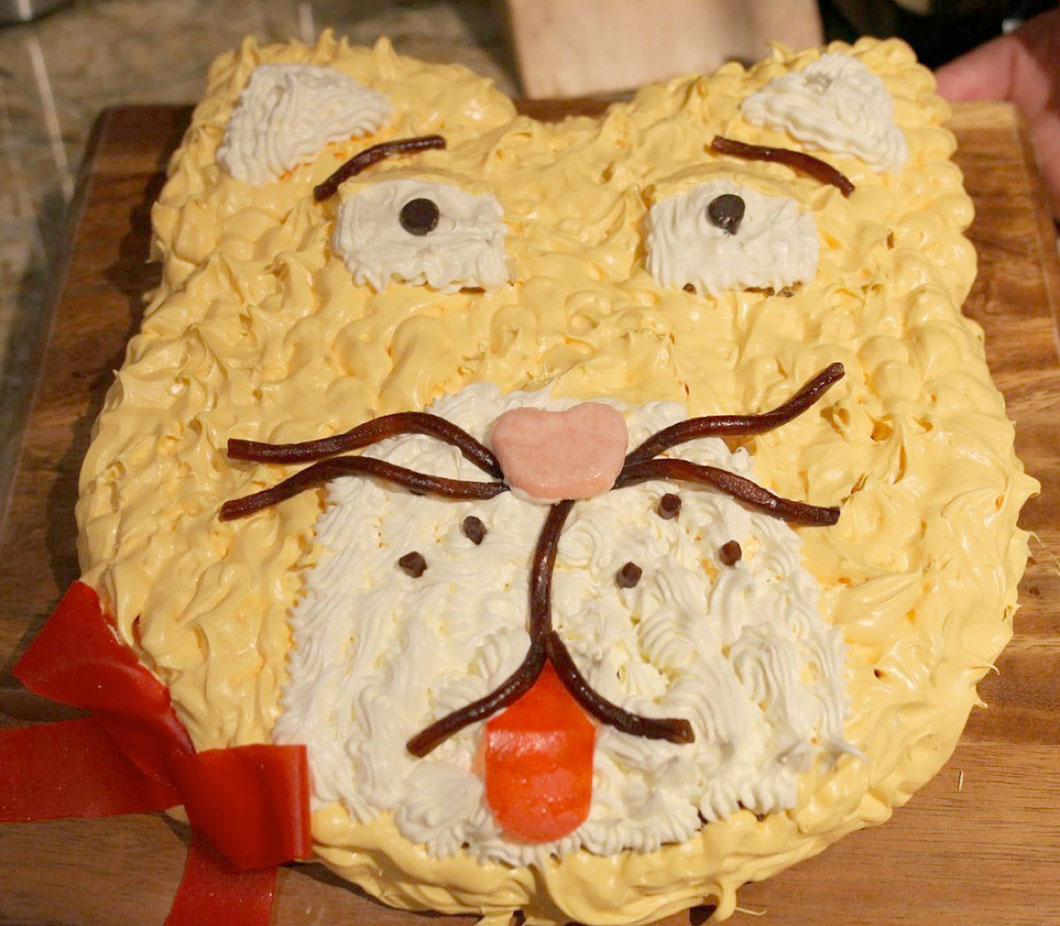
Fun Challenge:
Remember the left over cake batter we made into cupcakes? Why not decorate your little kitten? Here’s our tiny kitty cupcake! Isn’t he cute?! 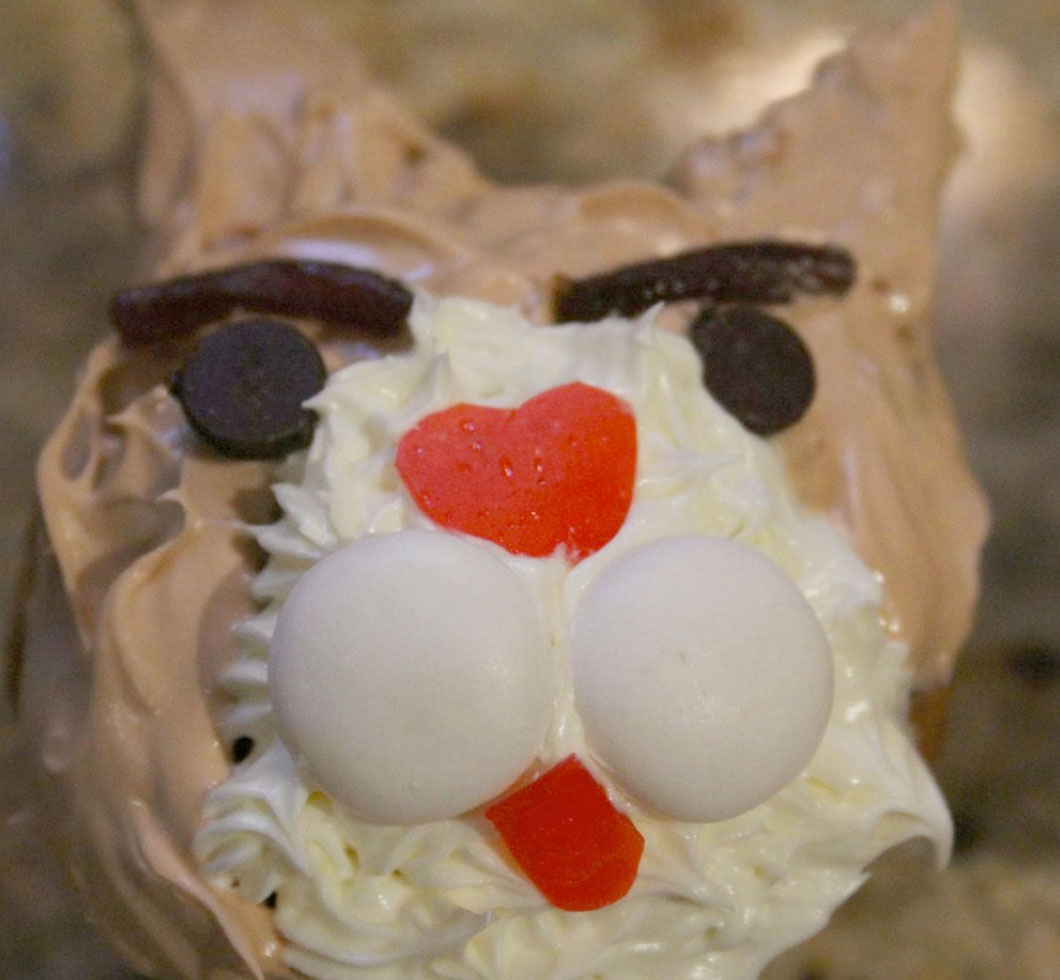 Credit: Cake Design: Shannon Swanson Cake Photography: Emma Barr